Sealing Duct from the Interior
and why it ensures the tightest seal…
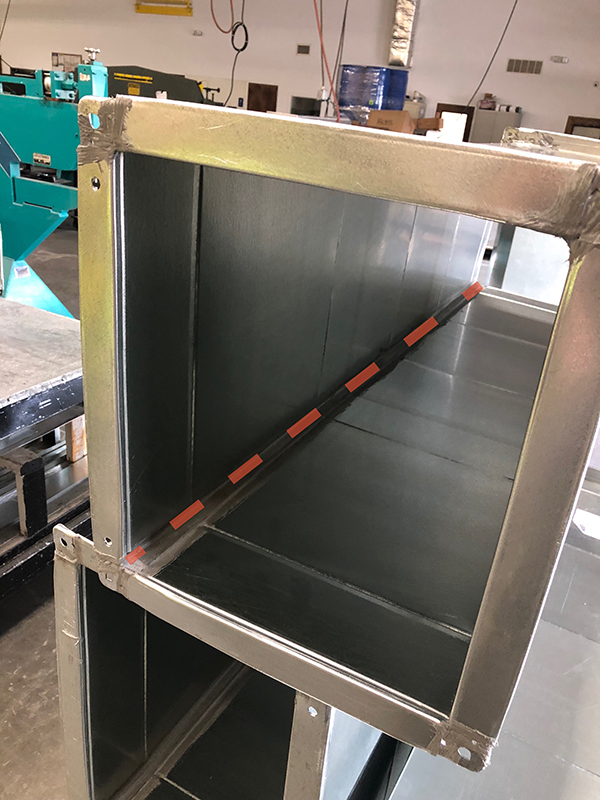
Many Sheet Metal Contractors recognize that ALL of the Duct’s Pressure is from the inside…pushing out, and that sealing the lock’s interior is not only aesthetically better but also better from an engineering perspective. Many engineers don’t want to see mastic on the exterior and the pressure test will reveal any ductwork that is unsealed anyway. And some engineers spec cartridges of duct sealant on the interior of the ductwork rather than the exterior due to the benefit of extending the life of the seal upwards of 30%.
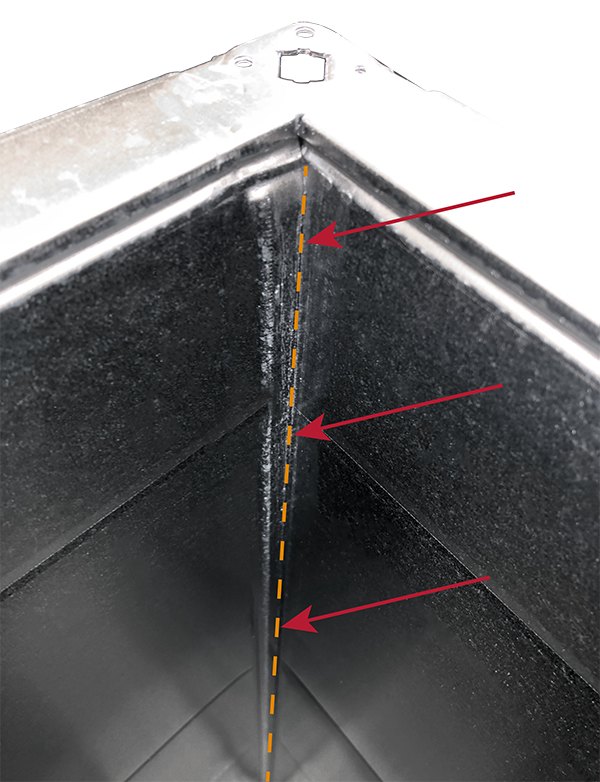
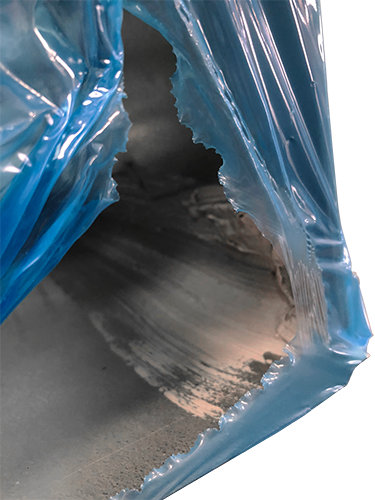
- Arrows indicating the only point where leakage could occur. Sealing the Pittsburgh Lock on duct interior requires only a narrow bead of mastic. Shops that are aware of this use a mastic in a cartridge.
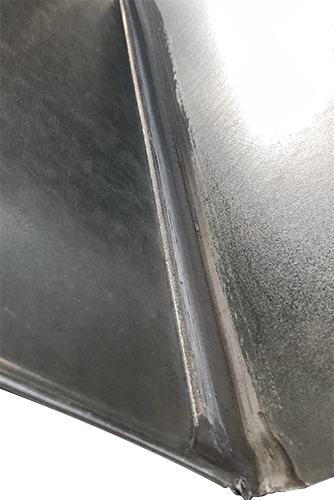
Good: Bucket and Brush

- With a Brush and Bucket this is what sealing the interior duct Pitts seam often looks like
Bucket and brush, though sometimes labor intensive is the most common method in HVAC Duct for Longitudinal Seam, Transverse Joints and Duct Penetrations
Better: Caulking Gun
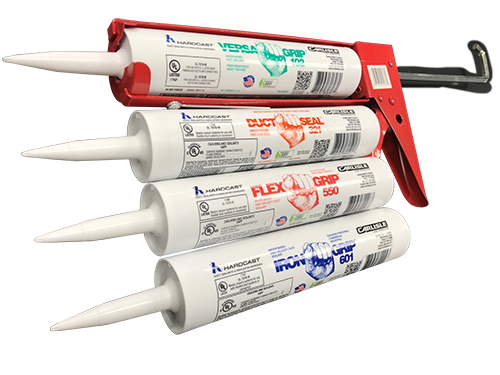
- Cartridge and Caulk Gun
- Duct Sealant applied by cartridge gun to Pittsburgh Lock on Duct Interior
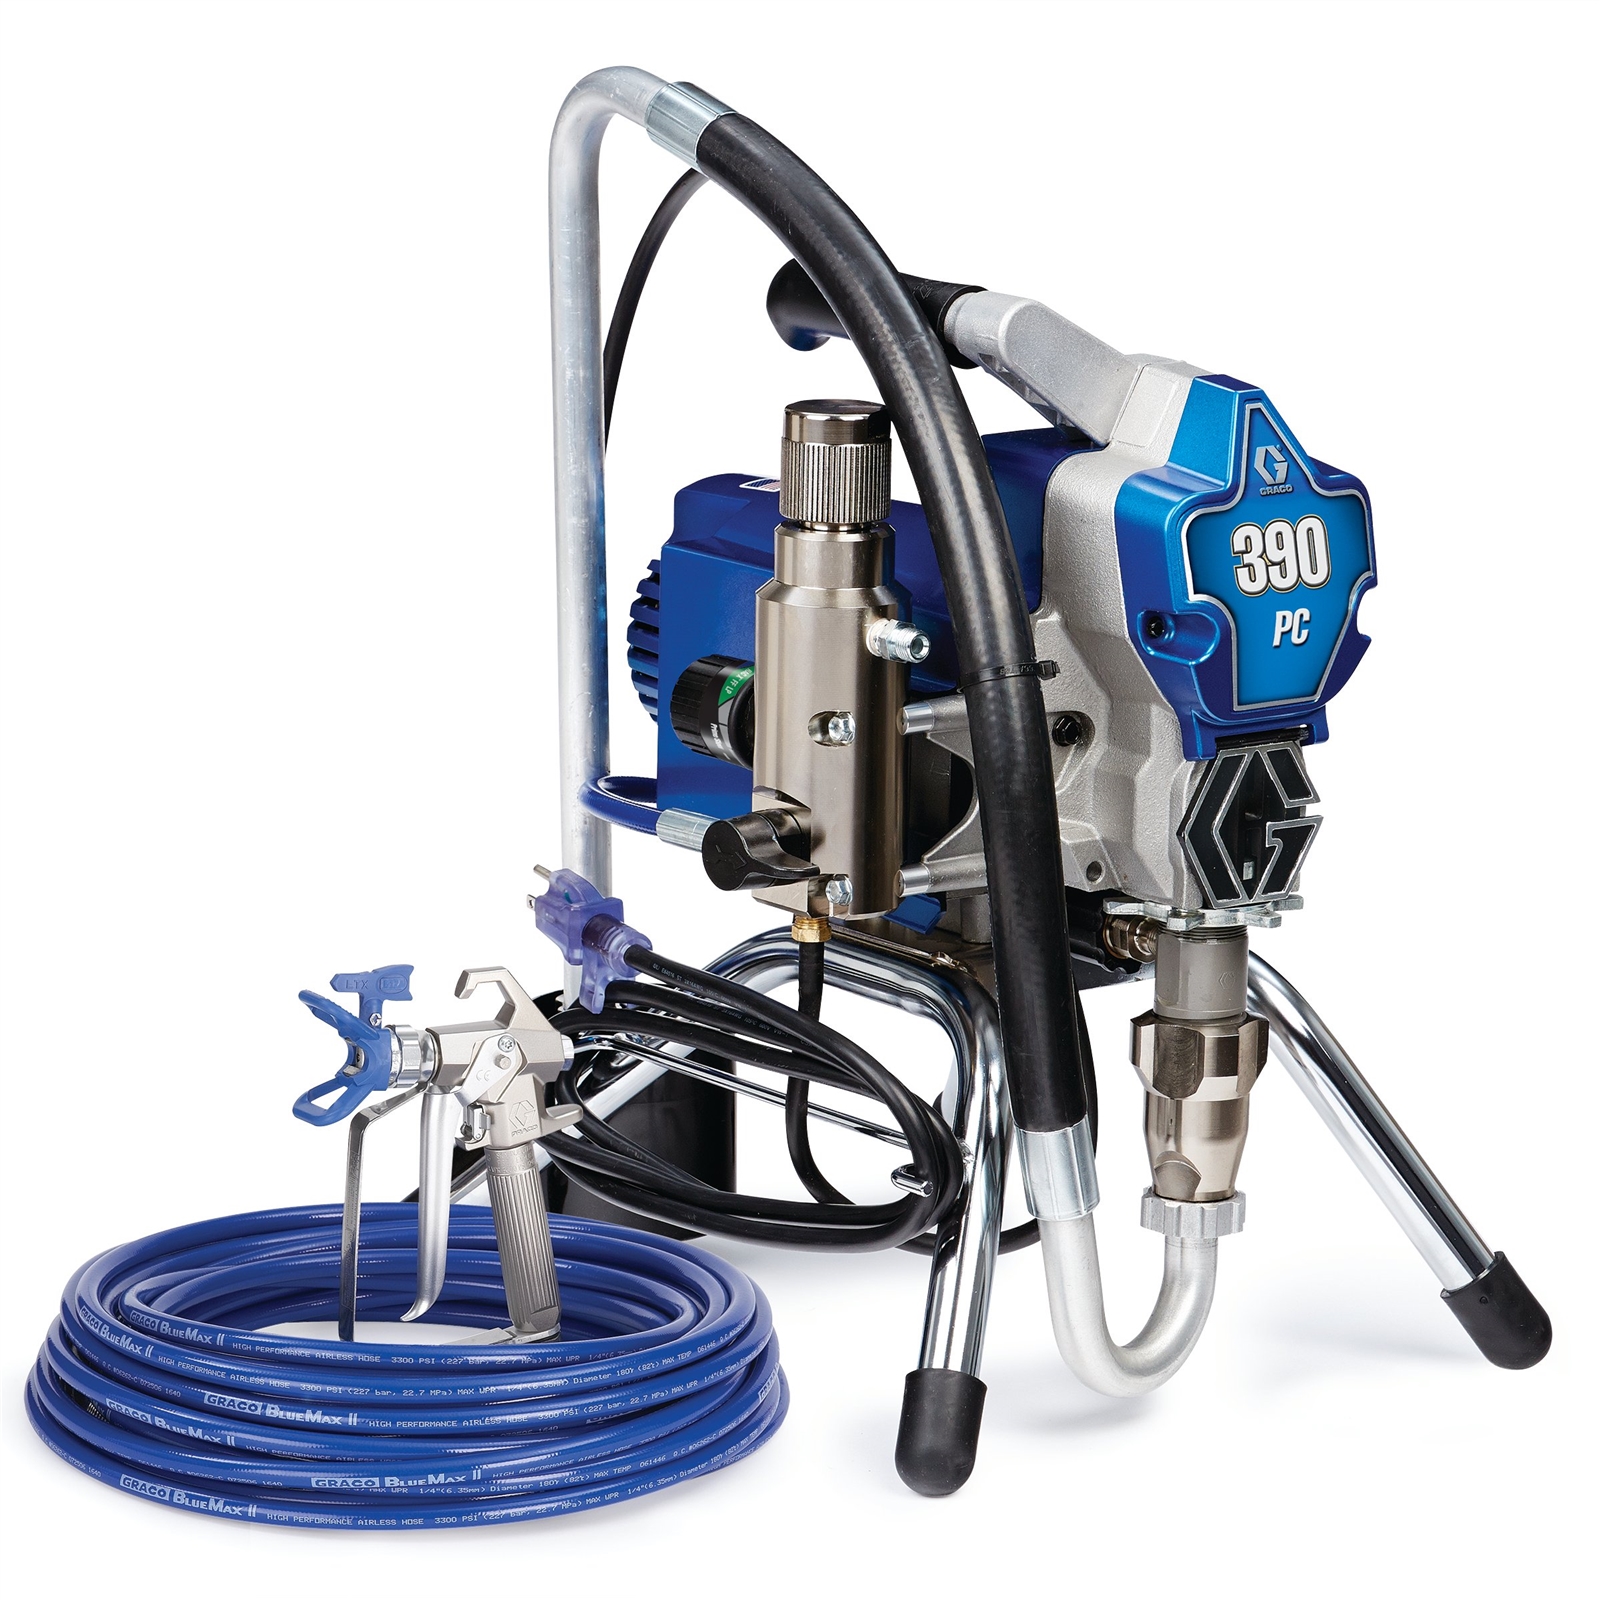
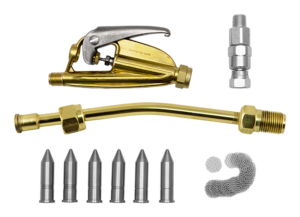
Best: Extrusion Gun Kit
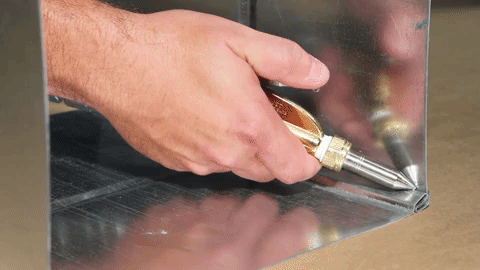

Hardcast’s Cartridge Killer allows the shop to apply a bead of mastic the same way they would use a Caulk Gun and Cartridge of Mastic but instead with an apparatus that applies the bead of mastic using an applicator with extrusion tips and a wand extension connected to a hose, Graco 390 pump and 5 gallon pail of Duct Sealant.