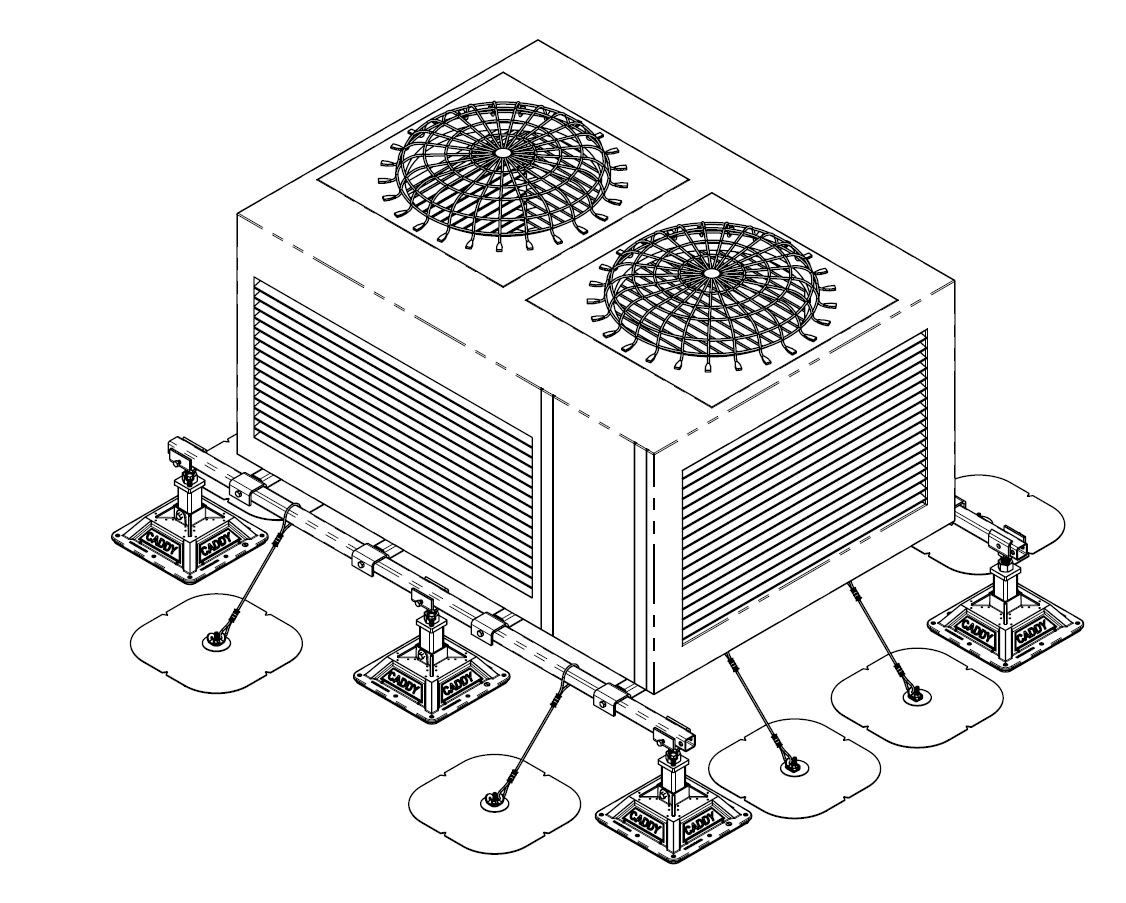
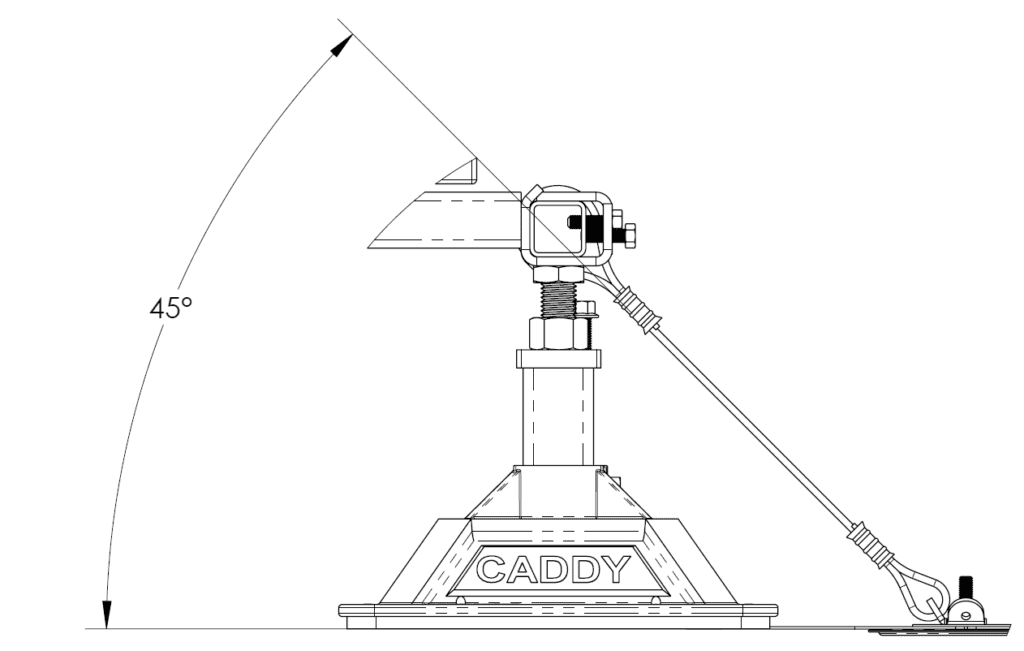
Step 1: Install the rooftop anchor, purchased seperately. Ensure that anchor is installed so that the cable will be at a 45 angle when installation is complete. Refer to the instruction sheet included with the anchor or www.nVent.com for installation instructions. Ensure the screws are snug, but not so tight as to create a depression in the roof assembly.
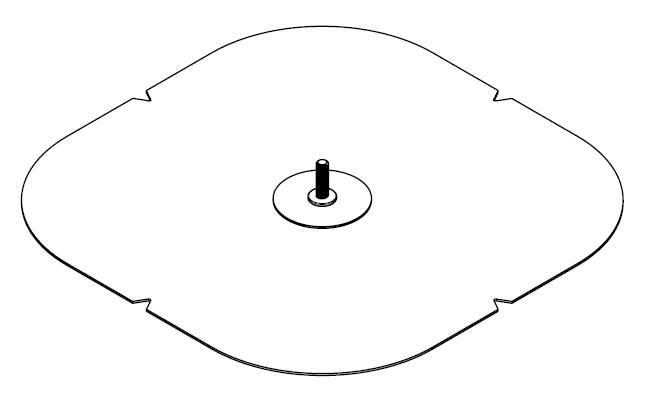
Step 2: Install the Universal Restraint Clip (URC) so the STEP 2: top of the nut is flush with the top of the bolt.

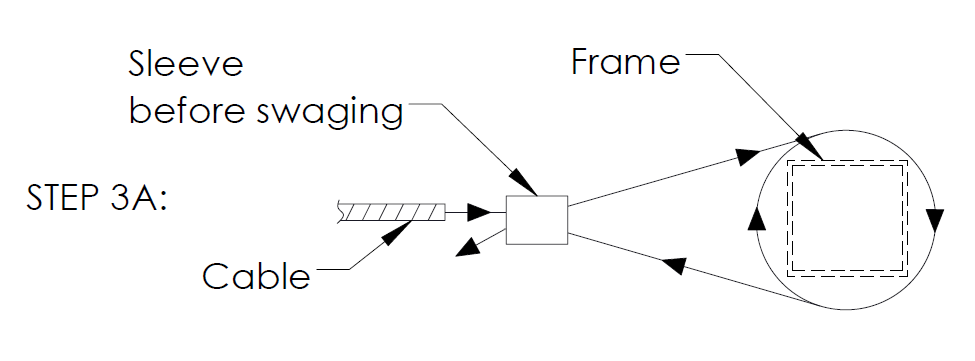
Step 3A: Insert cable through the sleeve, wrap the cable around the frame two times, and then back through the sleeve to create a loop.
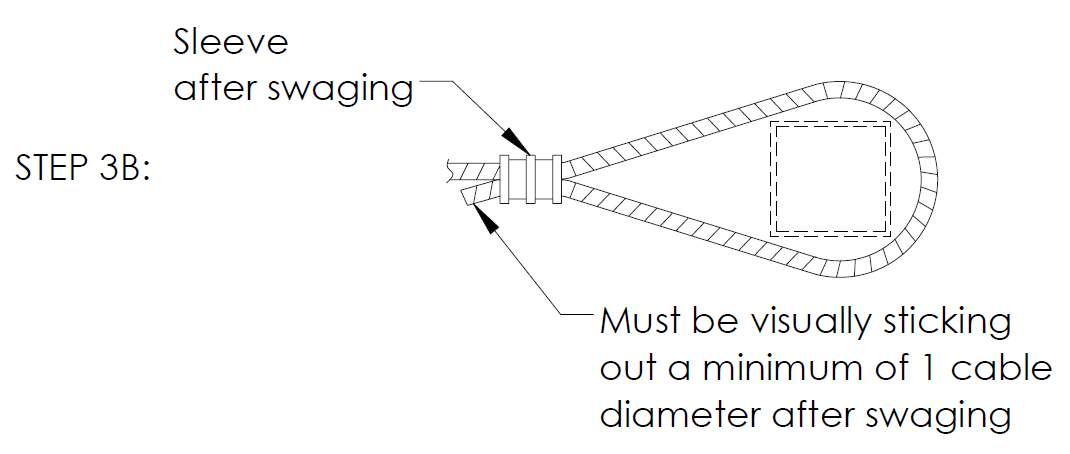
Step 3B: The sleeve must be swaged from one end of sleeve to the other using an approved swaging tool from nVent. The tail of the cable must be
visually sticking out of the sleeve after swaging. Refer to the manufacturers swaging tool instruction sheet for the number of swages needed per cable
size and for gaging instructions.Ensure that there is no excess slack in the cable and that the cable will not move after tensioning.
Step 4: Tighten the nut down to 20 ft-lbs to remove any aditional slack and to tension the cable. Ensure that after installation, the cable is at a 45° angle and the URC is flush with the top of the anchor.
Download PDF Instructions for CADDY Pyramid Rooftop Anchor System